
Table of Contents
فوائد الترقية إلى لوحة أزرار ناعمة لمرحاضك
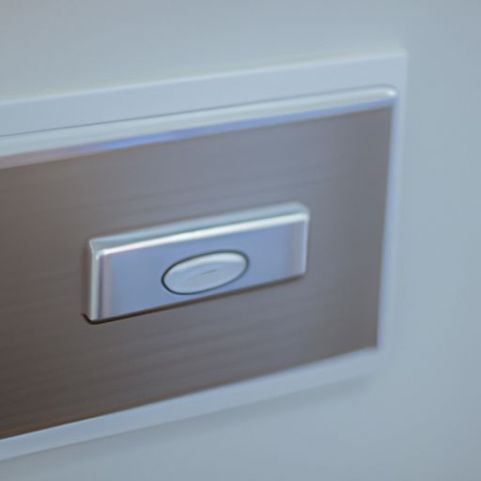
إن ترقية المرحاض الخاص بك ليشمل لوحة أزرار ناعمة يمكن أن تضفي لمسة من الحداثة والراحة على حمامك. توفر هذه اللوحات الأنيقة والعصرية بديلاً أكثر صحة وسهولة في الاستخدام للأزرار أو المقابض التقليدية. بمجرد لمسة لطيفة، يمكنك بسهولة تنشيط آلية التدفق، مما يجعلها تجربة بسيطة وخالية من المتاعب لجميع المستخدمين.
في الختام، فإن الترقية إلى لوحة أزرار ناعمة لمرحاضك توفر مجموعة من الفوائد، بدءًا من سهولة الاستخدام والنظافة وحتى المتانة والجمال. بفضل تصميمها الأنيق ووظائفها سهلة الاستخدام، توفر لوحات الأزرار الناعمة بديلاً عصريًا ومريحًا لأزرار التدفق التقليدية. سواء كنت تتطلع إلى تحسين المظهر العام لحمامك أو تريد ببساطة خيار تنظيف أكثر نظافة وسهولة في الاستخدام، فإن لوحة الأزرار الناعمة تعد خيارًا عمليًا وأنيقًا لأي منزل.
كيفية تركيب زر ضغط فردي غير قابل للصدأ في الحمام الخاص بك
يمكن أن يكون تثبيت زر ضغط واحد غير قابل للصدأ في حمامك طريقة رائعة لإضافة لمسة عصرية وأنيقة إلى مساحتك. هذه الأزرار ليست أنيقة فحسب، بل عملية أيضًا، مما يجعل من السهل تنظيف المرحاض الخاص بك بمجرد ضغطة بسيطة. في هذه المقالة، سنوجهك خلال عملية تثبيت زر ضغط واحد غير قابل للصدأ في حمامك.
قبل أن تبدأ عملية التثبيت، من المهم جمع كل الأدوات والمواد اللازمة. ستحتاج إلى مفك براغي، ومثقاب، وقلم رصاص، وشريط قياس، وبالطبع مجموعة أزرار الضغط المفردة التي تعمل باللمس. تأكد من قراءة التعليمات المرفقة مع المجموعة بعناية قبل بدء التثبيت.
الخطوة الأولى في تثبيت زر الضغط الفردي المقاوم للصدأ هو تحديد موضع الزر على المرحاض الخاص بك. استخدم شريط القياس لقياس المسافة بين مركز خزان المرحاض والجدار. سيساعدك هذا على تحديد الموضع المثالي للزر. استخدم قلم الرصاص لتحديد المكان الذي ستحفر فيه ثقب الزر.
بعد ذلك، استخدم المثقاب لإنشاء ثقب في المكان المحدد. تأكد من استخدام حجم لقمة الحفر المناسب لمجموعة الأزرار التي تستخدمها. بمجرد حفر الثقب، أدخل الزر في الثقب وقم بتثبيته في مكانه باستخدام البراغي المتوفرة في المجموعة. تأكد من تثبيت الزر بشكل آمن بخزان المرحاض قبل الانتقال إلى الخطوة التالية.
بعد تثبيت الزر بشكل آمن، ستحتاج إلى توصيل الزر بآلية التنظيف الخاصة بالمرحاض. قد تختلف هذه الخطوة وفقًا لمجموعة الأزرار المحددة التي تستخدمها، لذا تأكد من الرجوع إلى الإرشادات المتوفرة مع المجموعة. في معظم الحالات، ستحتاج إلى إزالة ذراع الشطف القديم واستبداله بآلية الزر الجديدة.
بمجرد توصيل الزر بآلية الشطف، اختبره للتأكد من أنه يعمل بشكل صحيح. اضغط على الزر لطرد المرحاض والتحقق من وجود أي تسرب أو خلل. إذا كان كل شيء يعمل بشكل صحيح، فيمكنك الآن الاستمتاع بزر ضغط واحد جديد مقاوم للصدأ يعمل باللمس في حمامك.
في الختام، يعد تثبيت زر ضغط واحد مقاوم للصدأ في حمامك عملية بسيطة ومباشرة يمكن أن تضيف لمسة من الحداثة إلى المساحة الخاصة بك. باتباع الخطوات الموضحة في هذه المقالة وقراءة التعليمات المرفقة مع المجموعة بعناية، يمكنك بسهولة تثبيت الزر بنفسك. فلماذا الانتظار؟ قم بترقية حمامك اليوم باستخدام زر ضغط واحد يعمل باللمس.
Installing a stainless touch single push button in your bathroom can be a great way to add a modern and sleek touch to your space. These Buttons are not only stylish but also functional, making it easier to flush your toilet with just a simple push. In this article, we will guide you through the process of installing a stainless touch single push button in your bathroom.
Before you begin the installation process, it is important to gather all the necessary tools and materials. You will need a Screwdriver, a drill, a pencil, a measuring tape, and of course, the stainless touch single push button kit. Make sure to read the instructions that come with the kit carefully before starting the installation.
The first step in installing the stainless touch single push button is to determine the placement of the button on your toilet. Use the measuring tape to measure the distance between the center of the toilet tank and the wall. This will help you determine the ideal placement for the button. Use the pencil to mark the spot where you will be drilling the hole for the button.
Next, use the drill to create a hole in the marked spot. Make sure to use the appropriate drill bit size for the button kit you are using. Once the hole is drilled, insert the button into the hole and secure it in place using the Screws provided in the kit. Make sure the button is securely attached to the toilet tank before moving on to the next step.
After the button is securely attached, you will need to connect the button to the flushing mechanism of the toilet. This step may vary depending on the specific button kit you are using, so make sure to refer to the instructions provided with the kit. In most cases, you will need to remove the old flushing lever and replace it with the new button mechanism.
Once the button is connected to the flushing mechanism, test it to make sure it is working properly. Press the button to flush the toilet and check for any leaks or malfunctions. If everything is working correctly, you can now enjoy your new stainless touch single push button in your bathroom.
In conclusion, installing a stainless touch single push button in your bathroom is a simple and straightforward process that can add a touch of modernity to your space. By following the steps outlined in this article and carefully reading the instructions provided with the kit, you can easily install the button yourself. So why wait? Upgrade your bathroom today with a stainless touch single push button.